
How to Do a Side-Lying Leg Raise

Side-lying leg raises are great in that they can be performed almost anywhere and do not require any additional equipment. This exercise targets one of the strongest yet often overlooked muscles in the body, the gluteus maximus. You’ll also benefit from stronger hip adductors and outer thighs.
Performing this exercise on a regular basis can help you to have a better range of motion through the hips and reduces the overall risk of injury to the hips, knees and lower back.
How To
- To perform the standard side leg lift, lay down on either side on the floor or a mat. Your body should be in a straight line with legs fully extended and one leg stacked on top of the other.
- You can either lay your head on your outstretched arm, or place your elbow on the floor and support your head on your hand. Your other hand can support you by pressing into the floor, or anywhere that feels comfortable. Make sure this hand is not doing the work for your abs, though.
- Contract your abdominals and exhale as you slowly lift the top leg upward until you feel the muscles in your lower back or obliques (the sides of your abdominals) contract. Make sure to keep your abs engaged during the entire maneuver.
- Once you feel those muscles flexing, inhale and slowly lower the leg back to rest on your bottom leg.
Repetitions
Aim to do 10–12 repetitions on each side. If you feel your abs starting to slack and not wanting to work, take a break.
Variations
Standing: Standing side leg raises can be done anywhere anytime. If you are confident in your balance, you can place your hands on your hips, but otherwise use a chair or railing to steady yourself. Stand up tall and make sure to keep your leg straight as you lift it out to the side and then lower it back down.
Weighted: If you’re ready for a challenge, consider using ankle weights, or a resistance band placed around the thighs for added difficulty. This can be done whether lying down or standing.
Planking: Do you really want to take it up a notch? Consider performing side leg raises while in a side plank position. This can be done while supporting yourself on your elbow or with your arm fully extended. This requires a lot of extra stabilization from your core muscles, so go slow and really concentrate on your form.
Cautionary Notes
Make sure not to rotate your knee as you lift your leg. You want to keep your leg straight and fully aligned during the movement to avoid stressing the knee joints.
Slow and controlled is important, to reap the full benefit of this exercise. Wrenching your leg up as high and fast as you can go will not do you any good and may and up pinching a nerve or muscle instead.
If you experience hip pain while lying on the floor, try placing a towel or blanket under your hip for additional support. If that doesn’t help, standing leg raises may be a better choice.
Anyone recovering from or dealing with an abdominal hernia should consult their doctor or a fitness professional before attempting this exercise.
More Side-Lying Leg Raise Related Resources
Side Lying Leg Raise : Glutes, Hips, Obliques – MSN Health & Fitness
Side-Lying Leg Lift Video – Watch Proper Form, Get Tips & More | Muscle & Fitness
Side-lying Leg Lift
Side Leg Raises Two Ways with Variations and Tips
What Muscles Do Side Leg Raises Work? | Livestrong.com
Related Videos

Side-Lying Leg Lift - Glute Strengthening Exercises for Runners
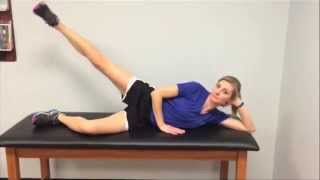
Exercise for Runners and Walkers: Single Leg Raise-Abduction
014 Side lying leg lift - physiotherapy video
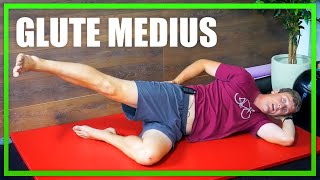
Basic Glute Medius Strength Exercise for Runners - Side Lying Straight Leg Raise
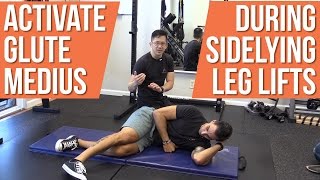
Can't activate glute medius during sidelying leg lifts
-
Side-Lying Leg Lift - Glute Strengthening Exercises for Runners
-
Exercise for Runners and Walkers: Single Leg Raise-Abduction
-
014 Side lying leg lift - physiotherapy video
-
Basic Glute Medius Strength Exercise for Runners - Side Lying Straight Leg Raise
-
Can't activate glute medius during sidelying leg lifts
What the side-lying leg raise works and why it matters
The side-lying leg raise is a bodyweight exercise that targets the hip abductors, the muscles that pull your leg away from the center of your body. The main muscle doing the work is the gluteus medius, which sits on the outer surface of your hip. The tensor fasciae latae, a smaller muscle along the outer thigh, helps out too.
These muscles do more than lift your leg sideways. They stabilize your pelvis every time you walk, run, or stand on one foot. When they are weak, your hip drops to the opposite side during movement. That compensation can lead to knee pain, lower back strain, and poor posture over time.
The side-lying leg raise is a good starting point because it removes most of the load from your spine. You are lying down, so your back is not under pressure. That makes it a common choice in physical therapy, post-surgical rehab, and beginner strength programs.
How to perform the side-lying leg raise with correct form
Getting the form right matters more than how many reps you do. A sloppy rep trains the wrong muscles and can create bad movement habits.
Starting position
Lie on your side on a firm surface. Your body should form a straight line from your head to your feet. Stack your hips directly on top of each other. Stack your feet too. Rest your bottom arm under your head or along the floor in front of you for balance.
Keep your bottom leg straight or bend it slightly at the knee if that feels more stable. Your top leg stays straight throughout the movement.
The movement
Breathe in to prepare. As you breathe out, lift your top leg toward the ceiling. Stop when your leg reaches about 45 degrees, or roughly level with your hip. Going higher usually causes your pelvis to tilt and your lower back to take over.
Pause for one second at the top. Then lower the leg slowly back to the start. Control the lowering phase. Dropping the leg fast removes the muscle-building benefit of the downward motion.
What to avoid
- Do not let your top hip roll backward. That is the most common mistake, and it shifts work away from the gluteus medius.
- Do not point your toes at the ceiling. Keep them facing forward or slightly down to keep the right muscles engaged.
- Do not hold your breath. Breathe steadily through every rep.
- Do not rush. A slow, controlled rep takes about three seconds up and three seconds down.
Sets, reps, and progressions
If you are new to this exercise, start with two sets of 10 to 15 reps on each side. Rest 30 to 60 seconds between sets. Once you can complete three sets of 20 reps with full control, it is time to make the exercise harder.
Ways to add difficulty
The simplest progression is adding a resistance band. Loop a light band just above your knees or around your ankles. The band pulls your leg back toward the starting position throughout the lift, which makes your hip abductors work harder the entire time.
Another option is to add a brief hold at the top of each rep. Holding for three to five seconds increases time under tension, which builds strength and endurance in the muscle without adding external weight.
You can also slow the lowering phase to four or five seconds. That eccentric loading, meaning the muscle is working while it lengthens, is one of the most effective ways to build strength with bodyweight exercises.
Moving to more advanced exercises
The side-lying leg raise is a foundation exercise. Once your hip abductors are strong, you can progress to standing exercises that challenge balance at the same time. Lateral band walks, side-step squats, and single-leg deadlifts all build on the base the side-lying leg raise creates.
Who benefits most from this exercise
This exercise is useful for a wide range of people. Beginners get a low-risk introduction to hip strengthening. Older adults use it to maintain the balance and stability that reduce fall risk. Runners include it to correct hip drop, a pattern that causes many overuse injuries. People recovering from knee or hip surgery often start here because the lying position keeps stress off the joint.
It is also a standard corrective exercise for people with IT band syndrome, patellofemoral pain (runner’s knee), and certain types of lower back pain linked to weak glutes.
How this exercise fits into a full training program
The side-lying leg raise works well as a warm-up drill before lower-body training. Doing two sets before squats or deadlifts activates the gluteus medius and reminds your hips to stay stable during heavier compound lifts.
It also works as a standalone accessory movement at the end of a workout. In that role, it adds volume to the hip abductors without taxing your nervous system the way heavier exercises do.
Personal trainers often program it three times per week, either as an activation drill or a finisher, depending on the client’s goals and starting strength level.
Common questions about side-lying leg raises
Should I feel this in my outer hip or my lower back?
You should feel the work in your outer hip and the side of your glute. If you feel it mainly in your lower back, your pelvis is probably tilting during the lift. Reset your position, reduce the range of motion, and focus on keeping your hips stacked.
How many days per week should I do this exercise?
Two to three days per week is enough for most people. The hip abductors are small muscles that recover quickly, but they still need at least one rest day between sessions when you are building up strength.
Can I do this exercise if I have hip pain?
That depends on the cause of the pain. Many physical therapists prescribe this exercise to reduce hip pain from certain conditions. If you have an existing injury or diagnosis, check with your doctor or physical therapist before adding it to your routine.
Does this exercise replace squats and lunges?
No. Squats and lunges train different movement patterns and muscle groups. The side-lying leg raise targets hip abduction specifically. It complements compound lower-body exercises; it does not replace them.
What personal trainers need to know about this exercise
If you are studying to become a personal trainer, the side-lying leg raise is worth understanding in depth. Clients with desk jobs often have weak hip abductors because sitting for hours shortens the hip flexors and reduces activation in the glutes. Being able to assess that weakness and program a corrective exercise like this one is a core skill in client program design.
Major certification bodies, including NASM, ACE, and ISSA, cover hip abductor function and corrective exercise principles in their curricula. You will likely see questions about movement assessment and muscle function on your certification exam. Understanding how exercises like this one work mechanically, and knowing when and why to prescribe them, is part of what separates a knowledgeable trainer from one who just counts reps.
Learning to coach form is equally important. The cues that help one client understand the movement may not land for another. Developing a few different ways to explain hip stacking, pelvic control, and breathing gives you better tools for real-world sessions.
Next steps if you want to build this knowledge professionally
Understanding individual exercises is one part of personal trainer education. A formal certification program teaches you anatomy, program design, nutrition basics, client assessment, and exercise science in a structured way. That foundation helps you apply exercises like the side-lying leg raise in the right context for the right client.
If you are thinking about pursuing a personal trainer certification, look into accredited programs that align with your timeline and learning style. Some programs are fully online. Others include in-person practical components. Costs and formats vary, so compare a few options before you commit.
Explore personal trainer certification programs to find one that fits your goals and get started on building the skills that clients count on.