
How to Do a Supine Row

This is an excellent exercise to add to your routine if you’re looking to strengthen your pulling muscles. It is much more accessible to the average gym enthusiast and can go a long way toward building the muscles required to a complete a pull-up. Supine rows target all of your back muscles without the strain of a traditional bent-over row. They also target the biceps and forearms and help to increase grip strength. As an added bonus, the abs and glutes are activated during the exercise.
This exercise can help to develop better posture as well as strengthen and protect the shoulders from injury. Activities that require lifting and pulling heavy objects will become easier as a result of performing regular supine rows.
How To
- To begin, set the bar to about waist height, or higher if needed.
- Position yourself on your back underneath the bar. The bar should be centered over your chest, and your back should clear the floor when you take hold of the bar. You don’t want to come into contact with the floor at the bottom of each rep.
- Take hold of the bar at slightly wider than shoulder width. You should be using an overhand grip, with palms facing away from you.
- Engage your abs and glutes, thinking about keeping your entire body in a straight line through the entire exercise. As you pull your chest to the bar, actively pull your shoulder blades together and down your back as you drive your elbows back.
- Pause for a beat at the top of the motion and then slowly lower yourself down. Remember to keep the body straight and muscles engaged all the way down.
Repetitions
Three sets of 10 is a great average to aim for. If you can’t complete that many, then start with three sets of five and work your way up. If you want to challenge yourself, you can start working toward three sets of 20.
Variations
Higher bar: Set the bar higher if waist height is too low to begin with. Depending on how high you have the bar set, you may be able to grip the bar and walk your feet out until you are at an angle that you’re comfortable with. As the bar gets lower, you can crouch down and walk your feet out until the body is extended, or raise yourself up from a seated position under the bar.
Bent knees: Bending the knees can help to reduce the amount of weight you are lifting. Make sure to maintain a straight body from the knees up when using this variation.
Adding weight/ changing the angle: To increase the level of difficulty, you can add a weighted belt, or even put your feet up on a sturdy block. This puts your upper body on a decline and raises the level of difficulty significantly.
Cautionary Notes
Make sure you do not arch your back. Similarly, try not to let your body sag. You want to keep your body in a straight line from heel to ear.
Try not to shrug your shoulders as this can cause a strain to the neck. Always think about keeping the shoulders pulled down throughout the movement.
Some people will seek to create their own bar so they can perform this exercise at home. If you are going to do this, just be careful that you are working under a stable apparatus.
More Supine Row Related Resources
Inverted row exercise instructions and video | Weight Training Guide
How to Do an Inverted Row (Bodyweight Rows): Ultimate Guide | Nerd Fitness
Inverted Row | Exercise Videos & Guides | Bodybuilding.com
How To Do The Inverted Row | Coach Exercise Guide
ExRx.net : Inverted Row
The Pull Up Vs. The Inverted Row | Redefining Strength
How to Master Inverted Bodyweight Row Form for Back Muscle
Inverted Row Exercise Form Guide with Video & Pictures
Related Videos
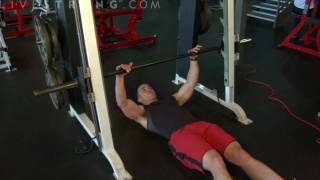
How to Do Supine Row Exercise
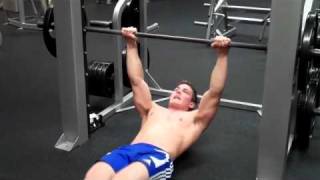
How To: Smith Machine- Inverted Row
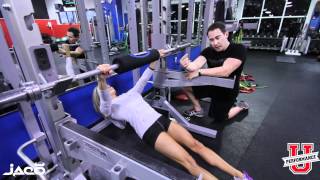
Inverted Row Exercise - Best Form Tips!
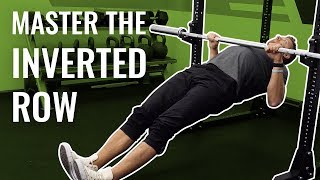
Inverted Row Guide | Form Tips, Muscles Worked, and Mistakes
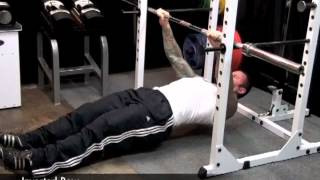
Inverted Row by Jim Stoppani
-
How to Do Supine Row Exercise
-
How To: Smith Machine- Inverted Row
-
Inverted Row Exercise - Best Form Tips!
-
Inverted Row Guide | Form Tips, Muscles Worked, and Mistakes
-
Inverted Row by Jim Stoppani
What the supine row is and why it matters for training
The supine row is a pulling exercise you do lying on your back. You pull your chest up toward a fixed bar or rings while your heels stay on the floor. Your body stays straight, like a plank, throughout the movement. The exercise works your upper back, rear shoulders, and biceps. It is also called an inverted row or Australian pull-up.
The supine row is useful because it trains the same muscles as a pull-up, but it is easier to scale. You can make it harder or easier by changing your body angle. That makes it a good starting point if you cannot yet do full pull-ups, and a solid accessory move even when you can.
Muscles the supine row targets
The main muscles you work are the rhomboids and the middle trapezius. These sit between and around your shoulder blades. They pull your shoulder blades together when you row. You also work the latissimus dorsi, which runs along the side of your back. Your rear deltoids, located at the back of your shoulder, assist throughout the pull. Your biceps bend your elbows as you lift. Your core and glutes contract to keep your body rigid.
Training these muscles improves your posture. Many people sit for long hours and develop weak upper backs. The supine row directly corrects that imbalance.
How to set up and perform the supine row
You need a fixed bar set at about waist height. A Smith machine bar, a barbell in a rack, or gymnastics rings all work. The lower the bar, the harder the exercise because your body angle becomes more horizontal.
Starting position
Lie on your back under the bar. Reach up and grip the bar with both hands, slightly wider than shoulder width. Your palms can face away from you (pronated) or toward you (supinated). Keep your arms fully extended. Place your heels on the floor with your legs straight. Tighten your core and squeeze your glutes so your hips do not sag.
The pulling phase
Pull your chest up toward the bar. Lead with your elbows, driving them back and out to the sides. Keep your shoulder blades pinching together as you rise. Your chest should touch or come close to the bar at the top. Do not let your hips drop or your lower back arch. Hold the top position for one second.
The lowering phase
Lower yourself back down in a slow, controlled way. Take about two to three seconds to return to the start. Full extension at the bottom gives your muscles a complete range of motion. That is one repetition.
Common technique errors
Letting the hips sag is the most common mistake. It shifts the work away from your back and onto your lower body. Keep your body in a straight line from heels to head throughout every rep. Another common error is flaring the elbows straight out to the sides too much. Aim for about 45 degrees from your torso. Pulling the elbows too wide reduces lat activation and puts extra stress on your shoulder joints. Also avoid using momentum or swinging your hips to complete a rep. If you need to swing, the bar is too low for your current strength level.
How to adjust difficulty
You can make the supine row easier or harder without changing the weight.
Making it easier
Raise the bar higher. The closer your body angle is to vertical, the less of your bodyweight you lift. Bending your knees and placing your feet flat on the floor also reduces the load. Both adjustments work well when you are learning the movement or rehabbing an injury.
Making it harder
Lower the bar so your body is more parallel to the floor. Elevate your feet on a bench so more of your weight shifts toward your upper body. You can also add a weight plate on your chest or wear a weighted vest. Slowing the lowering phase to four or five seconds increases the challenge without changing the load. Using gymnastics rings instead of a fixed bar adds instability, which forces your stabilizer muscles to work harder.
Programming the supine row into a workout
The supine row fits into most upper body and full body training programs. It pairs well with pushing exercises like push-ups or bench press because it works the opposite muscles. Pairing a push with a pull in the same session helps balance muscle development and can reduce shoulder pain over time.
Sets and reps for different goals
For building muscle, aim for three to four sets of eight to fifteen reps with two minutes of rest between sets. For building strength, use a harder body angle or added resistance and do four to five sets of four to six reps with two to three minutes of rest. For muscular endurance, do two to three sets of fifteen to twenty reps with sixty seconds of rest. Choose a difficulty level that challenges you in the last few reps without breaking your form.
Using the supine row as a pull-up progression
If full pull-ups are your goal, the supine row is a direct stepping stone. Start with a bar at hip height and focus on perfect form. Once you can do fifteen reps cleanly, lower the bar and repeat the process. When you reach a fully horizontal position and can complete ten clean reps, you have built most of the pulling strength a pull-up requires. From there, band-assisted pull-ups or jumping pull-ups can bridge the remaining gap.
The supine row in personal training practice
As a personal trainer, you will use this exercise often. It works for almost every client population. Beginners can start at an easy angle. Older adults benefit from the horizontal position because it removes spinal loading you would get with a barbell row. Athletes use it to build posterior chain strength for sport performance. Clients rehabbing shoulder or rotator cuff issues often find it more comfortable than overhead pulling exercises.
Coaching cues that work
Good cues make the difference between a client doing the movement well and doing it poorly. Simple, direct cues work best. Try these:
- Squeeze a pencil between your shoulder blades.
- Keep your body like a wooden plank.
- Pull your chest to the bar, not your bar to your chest.
- Drive your elbows back toward your back pockets.
Repeat one cue at a time. Giving a client four cues at once usually means none of them stick. Watch their hips first, then their elbow path, then their range of motion.
Spotting and safety
The supine row is a low-risk exercise, but you still need to watch for problems. Stand beside your client so you can see their hip position clearly. If their hips drop more than an inch at any point, stop the set and raise the bar. Clients with existing low back issues should start at a very high bar angle. Anyone with a recent shoulder injury should get medical clearance before training pulling movements.
Variations worth knowing
Once you and your clients have the basic movement down, variations can add variety and target muscles slightly differently.
Underhand grip supine row
Turn your palms to face you. This supinated grip places more emphasis on the biceps and lower fibers of the lats. Many people find this grip feels stronger. It is a good option for clients who want extra bicep work without adding curl exercises.
Single-arm supine row
Grip the bar with one hand and hold your free arm at your side or across your chest. This version exposes any strength difference between your left and right sides. It also increases the demand on your core to prevent rotation. Start with a higher bar angle when you first try single-arm rows.
Ring supine row
Gymnastics rings move freely, so your hands can rotate naturally as you pull. Many people find this more comfortable on the wrists and elbows. The instability also makes your shoulder stabilizers work harder throughout the range of motion.
Feet-elevated supine row
Place your feet on a bench or box. This shifts more of your bodyweight toward your upper body and makes the exercise significantly harder. It is a useful step between a standard horizontal row and pull-up training.
Equipment options when a gym bar is not available
You do not need a full gym to do supine rows. A sturdy table works if it can support your bodyweight. Grip the edge and row underneath it. A door with a towel looped over the top can work for lighter clients if the door frame is solid. TRX suspension trainers and similar systems allow supine rows at home and are easy to adjust. For outdoor training, a low playground bar is a simple option that many personal trainers use for outdoor boot camps.
Building your knowledge as a trainer
Understanding exercises like the supine row is one part of becoming a competent personal trainer. You also need to know anatomy, program design, client assessment, and behavior change strategies. A nationally recognized certification gives you a structured way to learn all of these areas and credentials employers check when hiring.
Personal training certification programs vary in length, format, and cost. Some prepare you for a single certification exam. Others include hands-on practicum hours where you coach real clients under supervision. Choosing the right program depends on your schedule, your learning style, and the certification you want to pursue.
If you are ready to take the next step, explore personal trainer certification programs that match your goals and timeline. Look at what each program covers, how it prepares you for the exam, and what support it gives you after you pass. The right program sets you up to work confidently with clients from your first session.